For months now, I have walked by an aisle at Hobby Lobby that displays all of the fabulous vinyl papers made specifically for a Cricut and other machines and I can’t help but drool. You see, I’m Cricut-less {GASP}! I know, it’s tragic… A crafty chica like me should be chirping away on a fancy Cricut, but no, not me… I have never made the investment because I’m afraid my family would never see me again and I just know that I would go broke buying every accessory that they make. I just want to make vinyl monograms without a machine!
I have also updated this post on 12/5/15 with this latest post about where I found pre-cut vinyl sticker letters here.
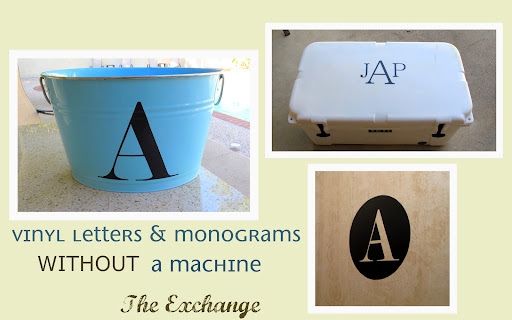
I just couldn’t help myself and I decided to buy a roll of black vinyl just to play with it and see if I could make vinyl letters and monograms without a machine. Well, it worked and the possibilities are endless!
This technique involves cutting with small scissors or an exacto knife, so small intricate letters or designs would involve a little extra time. However, this technique is ideal for large letters or large monograms where the cutting is minimal. If you’re willing to cut, the sky is the limit!
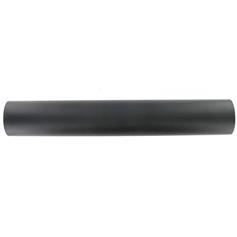
So I picked up a basic black roll of vinyl paper for die cutting machines made by Paper Studio for $3.50 (it was 50% off at Hobby Lobby). The package contained two large sheets sized 12″ x 36″ each. That’s a lot of vinyl for $3.50! Here is what they look like:

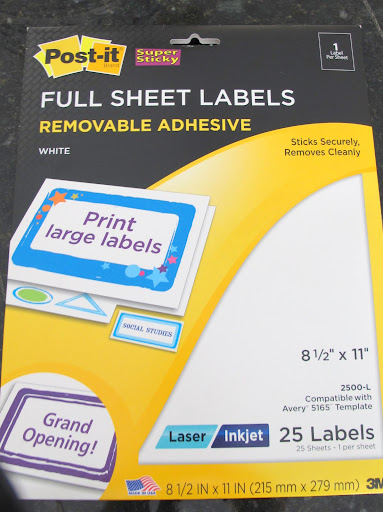
I always keep a supply of full sheet labels (8.5″ x 11″) at home both in removable and permanent adhesive. I do more projects with this product than anything else. For this technique, I used the removable labels, permanent will not work:
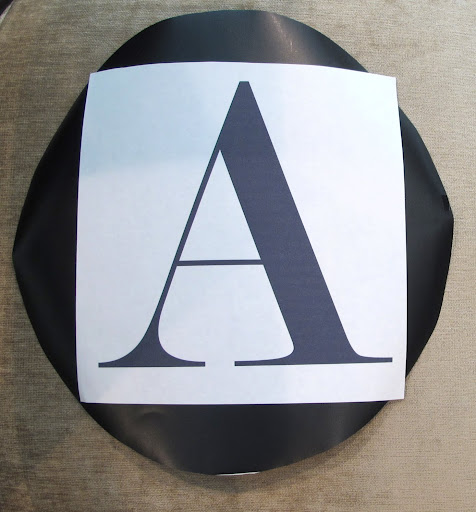
I decided to start with a large wall monogram, just to see if I could make it work. I used the font Modern No. 20 in the largest size I could get on a page in Microsoft Word (hint, go into margins and choose “narrow” for even more space). I then printed it out onto my label paper:

I then unrolled my vinyl paper and turned it over and used a lid from one of my pots to draw a perfect circle:


I cut out my circle and cut out excess space on my label with the letter and removed the backing and attached to the vinyl:
I then started to carefully cut out my letter with small sewing scissors (small scissors give you more precision). You can use an exacto knife too if it works better for you. If you use scissors, you have to cut in from the side but don’t worry, you will not see it once you place it together on the wall or item:

When I was done cutting, I removed the white label paper from the top of the vinyl paper (save the inside of the letter because you can use that too for something else):
I then removed the vinyl backing and carefully place on my wall in my bathroom. I used the edge of a credit card to smooth it out:


Keep in mind, if you are using the vinyl on a wall, the wall must have very little to zero texture for it to look flush and good.
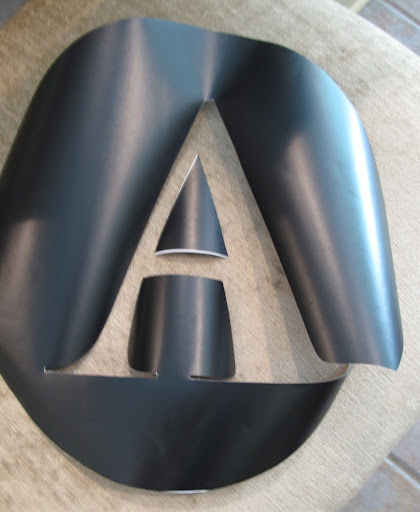
Next, I used the inside part of the letter that I cut out from my wall monogram and I placed it on a large metal beverage tub and smoothed out with a credit card:

You can also buy a roll of “transfer paper” (sold next to the vinyl rolls) that you rub onto your letter or monogram to help place/transfer it better on the wall or item. If I do anything more intricate, I will use the transfer paper.
The next thing I wanted to try was to monogram my husband’s Yeti. If you do not know what a Yeti is ladies, it is “supposedly” the Rolls Royce of coolers, at least that’s what hubby says. All the guys in the neighborhood freaked out and ran and picked up this cooler when it came out. I’m not sure what makes it so special I do know it’s bear proof (didn’t know we had bears in East Texas). Anyway, it is his pride and joy and I thought I would monogram it since all the guys had one now.
So I printed out hubby’s monogram as large as I could on my label paper (I clicked on orientation and switched to landscape). I again placed the label onto the vinyl and cut out the letters. I then placed each letter where I wanted it and rubbed on with a credit card:


Hubby was thrilled to see the monogram. I was a little worried if I would “de-man” it by adding the monogram but he seemed excited about it. I used the font “Batang” for the monogram in the largest size font I could get on the page (orientated to landscape).
I cannot wait to now go buy every color of the vinyl and also chalkboard vinyl to make labels too! There are so many different things that you can do with vinyl letters, monogram and images! Just look around on Pinterest and think about using the vinyl letters for personalized holiday gifts too! I love the vinyl monograms on glass large candle holders and you can’t go wrong with painting a canvas and adding a large monogram or letter and giving as a gift!
So many possibilities in getting creative without a machine! I no longer have to drool as I pass the vinyl!
Have a fantastic weekend friends and thank you again for your comments, emails and notes! It means a lot to me to hear your thoughts and feedback!
Cheers!
simply heidi says
This is great! The removable label idea was genius.
Anonymous says
You are so talented!!
Linda Durham
S. Greiner says
CHEAP, CHEAP vinyl at Expressions Vinyl…that's where I buy mine. You can buy it by the sheet in 1000 different colors (outdoor, indoor, speciality) and the shipping isn't bad…plus once you sign up for their free newsletter you start getting TONS of coupon codes! Just FYI on purchasing the vinyl.
The Exchange says
Thank you Linda!! and I think you're pretty fabulous! Thanks ladies for the sweet comments and thank you so much for the great advice on where to buy vinyl! I'm heading there now!
Cheers!
Cyndy
JULIE says
Yay! I love vinyl, but cannot buy a machine because my entire house (and my children!) would be monogrammed… Thanks for the tips!
Bonnie ~ a wee Meenit says
I too have been down the isles @ Hobby Lobby, Michaels, Walmart, you name it. Why does NO one sell pre-cut vinyl lettering!
I am gonna try this, thanks for the tip!!!
Janet says
Pretty sure I’ve seen pre-cut vinyl lettering at office supply stores, but there would not be all the font choices like Cyndy teaches about in this article.
feelincrafty says
Great idea! I too am vinyl cutter machine-less. everyone makes it look so fun and now we can join in too, without the machine! YEA!
The Exchange says
I see there is a bunch of us Cricket-less ladies just hanging out and waiting to share the vinyl love! So glad that you guys can use this technique! Thanks for stopping by ladies!
Criss T says
I've recently started struggling with Cricket / Silhouette envy! Thanks for ideas.
Kim @ Cheap Chic Home says
What a great idea. I'll have to keep this in mind when I'm drooling over final letters again.
Heather {Simply Cottage Love} says
I can just imagine I would think… "just a couple of vinyl monograms here and there… that will satisfy me…"… and then a heck would break loose! Great technique Cyndy!
Anonymous says
Great tip!! I'm excited to try this out. I started laughing when I saw the picture of your husbands "yeti". My husband had to have one, too. I became a big believer in it after our family vacation to Colorado. It kept everything frozen for days…..WOW!! It rode in the back of our truck in triple digit weather and it worked like a charm.
~Dana
Amy says
Great tutorial! I have wondered about this for a long time, but was worried the vinyl would pull or stretch with cutting if it wasn't done by a machine. I'm going to try this ASAP!
Candace @ Candace Creations says
love this tutorial because I don't have a machine and am too cheap to get one! but love vinyl!
thanks!
come link this up to scrappy saturdays @ candacecreations.blogspot.com
Renee says
I love this!!! I don't have a cricut either and will definitely be doing this now 🙂 I would love to have you share this at my Shabby Shares Saturday link party over at http://rustic-crafts.com
Ruth says
This is great!!! I,too, am Cricutless. I have wanted one but it's definitely not in the budget. Thanks for sharing this amazing idea.
Ruth
cheryl @ nefotlak. says
love it love it love it!!!
so i've pinned!!
thanks for sharing this.
cheryl xox.
InMyOwnStyle says
I am Silhouetteless too, same thing as Cricutless I think. I like the way you think. I have been getting VAT tape from my retail display friends. It does what the large labels do to make vinyls. Using the labels is brilliant and will be much easier for me to get.
I am going to link this post to my DIY page on my blog. It is so very clever!!
My best- Diane
Jill @ Junky Vagabond says
THANK YOU! I also am cutting-machine-less and now it doesn't matter 🙂
Elle & Lou says
Yes a cutting machine would be fantastic but this is a great alternative. Lynda
Grace @ Sense and Simplicity says
Aren't you the clever girl! I too always look at those projects wistfully since I don't have a machine either, but now I can consider them. I love the letter A on the bucket.
Katherines Corner says
Thank you, I'm cricutless too, giggle. This is a great way to use the vinyl. Love it. I love the tub! Hugs
Stacey says
You know, I was just standing in the same place yesterday wondering if I REALLY needed the machine to work with vinyl. Thanks for the great tips.
the momma (aka Shannon) says
ahhh…the trials of the cricut-less.
i, too, can feel your pain.
but i love that you were all "what's up NOW, cricut? me and my xacto knife got you beat!"
awesome.
your monograms are perfection.
The Exchange says
You guys are cracking me up! Thank you all!!
Cyndy
Abby says
Love this idea! Yours looks great, cant wait to give it a go!
John Lewis Sale says
It looks really awesome. gave me idea to mark my stuff like this so that my lil sister wont get on to my side of room
Jenny says
That is brilliant! I am going to do this! Thanks for sharing the tutorial!
I would love to have you link up with Creative Me Monday at The Southern Institute! My linky party runs all week long. Here's the link:
http://www.thesoutherninstitute.com/2011/09/creative-me-monday.html?utm_source=BP_recent
Hope to see you there!
Jenny
Anonymous says
Love! I'm Cricut-less, too and I had to choose between a sewing maching and die cut machine, so passed on the die cutter. Thanks for the tip!
Denise H.
Lauren @ My Wonderfully Made says
GREAT idea! I too do not have a Cricut or any die cut machine so I appreciate you figuring this out for us 'less fortunate ones' haha!
Katherines Corner says
me again stopping by to invite you join me at my first ever Thursday Favorites blog hop. Stop by and link up your lovely blog. Hugs
Carole @ Blue Chateau Interiors says
This is pure genius! Thanks so much for the detailed tutorial. I, too, drool over the "machines." Can't wait to try this.
Visiting from DIY by Design. Following you now. 🙂
Courtney and Heather says
Thanks so much for sharing! I have to try this!!
~Courtney~
love2sisters@gmail.com
Mel the Crafty Scientist says
This is AMAZING – love it and can't wait to try it out because I don't have a fancy cutting machine either! : )
-Mel the Crafty Scientist
Mel the Crafty Scientist says
P.S. I'm your newest follower and can't wait to explore your blog more!
-Mel the Crafty Scientist
Susan @ homeroad.net says
Hi! Love it! I've also run a sheet of paper sized contact paper through the printer upside down and printed backwards. Then I cut out the letters and got the same result as you did! Nice job!
Susan
Jenny @ Simcoe Street says
This looks so great — I love it!
Jenny
http://www.simcoestreet.blogspot.com
Cyndy says
What a great idea, I keep looking at those machines, but I'm not sure how much I will use them…I like this idea…thanks for sharing…
Dorice says
This is awesome! Do you know if this would work on a vehicle like the decals you see on car windows? I would love to try it.
Rushabh says
I have a scrapbook room and I wtnead to put all of the names of my family members on the wall. The vinyl is very sticky so I used a plastic ruler to attach the letters to until I could position them on the wall. To make the names straight, I used a level and drew a pencil line on the wall. I did not need the adhesive that is often ordered with this product. I’m not sure of the purpose of the adhesive as the vinyl went directly on the wall with no problem. I would also think the letters could easily be removed. I placed the names randomly on the wall and added scrapbook frames featuring some of my favorite pages randomly on the wall as well very pleased with the outcome!
Jami @ An Oregon Cottage says
Wow- thanks so much for the instructions! I’m going to do this for sure – I just have to get me some vinyl. 🙂 I’m subscribing, too- you’ve got some great ideas!
Carissa says
I usually admire crafty posts such as this but I could not hold it back you did an AMAZING job finding a thrifty alternative to buying a machine which is very expensive! This is so amazing I will now be following your blog and isn’t it amazing when you have a husband who is just as excited as you are when the project is done?!
kelli says
LOVE it! I am a spoiled brat with no kids yet and have 3 diffrent types of Cricuts! I had Cricut envy for 2 years, so I have done my research! I wanted to share with you guys the cheapest places to get one thats TOTALLY affordable! I have shoped HSN, Hobby Lobby, Walmart, you name it! I found the best price for the cricut is CowBoom.com which is owned by Best Buy. You get a cricket, a gypsy, and 4 cartridges all for ONLY $79!!! Granted it is not the biggest or best out there but it does the Exact same thing my other $400.00 Cricut does! If I had gotten this set first I would havenevergotsuckered into my Expression 2!! I get all my cartridges on Ebay for $10-15 from a seller named ‘PROUD PARENT 2’ who is a licensed dealer
patsy says
THANK YOU! THANK YOU!!! I too am circutless!! can’t wait to try this. Your tutorial is great by the way!
Lee says
Thank you for stopping me from buying a Cricut! I saved so much money. I can do this! Le
farraha says
Ok,
so can you do a tutorial on how to use your printer to do like a wall phrase Vinyl?
I have the Vinyl intended for the cricut but I’m cricut- less lol but I also have the transfer paper also intended for same machine.(paper 12×24 inches)
Now I get your concept but i’m wanting a whole phrase for my wall and the whole phrase as big as i want it to be is bigger than the printer paper size. now with that said I could do one letter at a time but it wont give me that connected lettering look.
Do you have a suggestion??? lol
PLEASE!!
Star says
Print out in banner style, page goes continous, but but is seperated per page, just fold paper edge over and tape together.
Mavis Young says
What a clever idea! I can’t wait to try this.
Janet says
I’ve been wanting to put a meaningful, inspiring phrase along a wall up near the ceiling. I thought it would be great to have one of those fancy schmancy machines so I could do this, but I already have way too many craft and sewing supplies. I’m afraid of spending all that money and then never using it much. I bet there are a lot of those cricut machines in homes around the world that never even get used after the novelty wears off.
Cyndy is my kind of girl! I’ve been kicking this idea around for a while now and still don’t have a phrase chosen. I maybe could transfer the outline and then fill in with paint. Having a pre-cut stencil would make it much easier, plus if I used a stencil brush, I could get that nice shaded effect.
Cutting the letters out of wallpaper could also be a nice effect too. Wallpaper can also be adhered in a non-permanent way, so it would be easy to remove if I wanted a change. I used to have a stack of wallpaper sample books and did make some nice greeting cards and also wrapped small packages from the pages of those books. When I moved, I threw them away. I got them from a paint store who was happy to give me as many of the discontinued sample books as I wanted. They had a great big pile of them in their back room. There are also great deals on whole rolls of discontinued wallpaper. I’ve even seen 6″ wide blank wallpaper rolls for creating your own border.
If Cricut machines can cut wallpaper, it would be great to find someone who already owns one and I’d pay her to cut out what I needed. So, if anyone owns a cricut machine, there’s a business idea for you!
Thanks Cyndy for inspiring me!
Shining Star says
print in banner style, pages with be continuous but separated per page, then fold edge over and tape together
Emily W says
Hi! What a great idea. Is there a way to do the circle shape monogram for this?! I love it and it would save so much money.
joy joyner says
Just found your blog on pinterest, love it. How do you get a bigger font when you print up monogram letters. My computer will not let me get the full page font. thanks!
Pam Ravenel says
I also do this, but I put my font on “outline” so that I don’t waste all my printer ink. Just an idea for those of us without a critcut.
Olivia says
Hi there! Would you mind if I share your blog with my myspace group?
There’s a lot of people that I think would really appreciate your content. Please let me know. Many thanks
Jenna says
This is great! I was hoping to find a way to monogram my boyfriend’s Yeti as well so I’m glad that I stumbled upon this… did the letters stick?
Jami says
I am trying to stick vinyl letters to an igloo cooler. Any tips on how to get it to stick? Thanks!!
Megan says
Just came across this post and you’ve saved my life where Christmas presents are concerned!! THANK YOU from a Cricut-less crafter!
Beth Marie says
This is so awesome, thanks for sharing. I just need to do one project NOW so this will get me started!
Paula Thurston says
How long did it last? Does the stickiness start to wear off after a period of time?
Thanks!!!!!
Marilyn says
You are the best!!! Thankyou so much for trying this out & sharing, im in the same boat & not sure about making such an investment plus I wouldn’t know which one to choose!!
Lenita says
I am making personalized aluminum water bottles for my daughters soccer team gifts and was just about to bite the bullet and buy the machine until I found this post! LOVE IT!!!!! Absolutely saved my weekend and appreciate the tips from the other ladies in the comments. Happy Crafting!
Cyndy says
Hi there Lenita!! This is an old post on my blog and I have finally found pre-cut vinyl letters that may be exactly what you need but there in an unusual section of the craft store. You can read my recent post about them here: https://www.thecreativityexchange.com/2014/09/monogramming-tricks-with-vinyl-gold-foil-letters.html
I hope this will help save you some time!
Katie says
Do you know if these vinyl letters would stick to a canvas?
Miyuki Boone says
Wait! You feel guilty getting a Cricut, but your husband has a YETI?!? LOLs
Jo @ To a Pretty Life says
What a great method! I like the way you transfer the printed image. It beats tracing or using carbon paper! My mom was a sign painter, and I used to help her cut out the vinyl letters she used. And I still remember the hand cramp from the scissors!
Logan says
That is AWESOME!!!!! Great job for figuring this out AND for the share with us!!
Carole Brinkert says
Thank you for all your knowledge & money savings ideas, l hope to be trying them soon! Thanks again for being generous with your time an talents!
A Japanese woman says
Thank you for sharing and showing your great job! I think you are talented and I love your ideas. I was just wondering and curious as to the meaning of the monogram for your husband’s Yeti? I don’t mean to blame or criticize your family’s private entertaining, but I was just a little sad, if it was hate-led or making fun of people, even if it is initials. However, I was lucky to find such a creative woman’s blog today, Thank you.
Cyndy says
Thank you for your note. The monogram on my husbands cooler/Yeti is his initials. I’m not going to post his full name here but it is his first, middle and last name initials. There is nothing “hate-filled” or derogatory about the monogram. In the post, you will also read that I mention that it is my husbands initials. I believe very strongly that it is not appropriate to make fun of anyone regarding race, gender or sexual orientation. Than you.
A Japanese woman says
Thank you for your sincere message, Cyndy. I believe your heart and your policy. I am sorry if my comment made you feel bad and maybe I was sometimes too sensitive about my race/history in the U.S. (I had several times very sad/angry experiences about my race, but I also know there are very sweet/kind Americans too.)
I will please to read your blog and I like your creativity (and your heart) very much!
Cyndy says
No worries! I’m thrilled that you will follow along with me on my blog. 🙂
Mary R. says
Omg!!! I would love to monogram different items but I do not have a machine. Thank you for sharing. Can’t wait to start. I’m so excited. Katy ,Texas
oralia says
hi was wondering can this be done on the vinyl for the machines?? i went and bought a bunch from micheals and wasnt aware i needed machine
im actually wanting to put my name on my cofee tumbler
Elizabeth says
Could tshirts, mugs, plates, tumblers be done this way as well? Thanks!
terryann says
thank you soooo much. wanting to put vinyl lettering on glass blocks for my daughters wedding. have never worked with this before. you explained process in an easy understandable way. going to tackle this tomorrow. she will love it.. thanks
Cyndy says
Yay!! So glad that you can use the tutorial! 🙂
Camille says
Hello I’m new to this,the cooler technic was really helpful.
Kaysie Mosley says
I love this little hack! I too am Cricutless , but love making shirts for my girls for football games their brother plays in! I make fabric appliques and sew them on. However I like this Idea so much better! I was wondering if you can use this method on t-shirts as well?
Thanks,
Kaysie
CHEREASE says
AWESOME! AWESOME! AWESOME! THANKS FOR SHARING! I KNEW THERE HAD TO BE A WAY. IT’S A LITTLE MORE WORK BUT AT LEAST NOW I KNOW IT’S POSSIBLE.
Tammy says
Can these be reusable? I’m trying to figure out how I can make my own letters and reuse them over and over again.
LJ says
Does this work on cotton and fabrics?