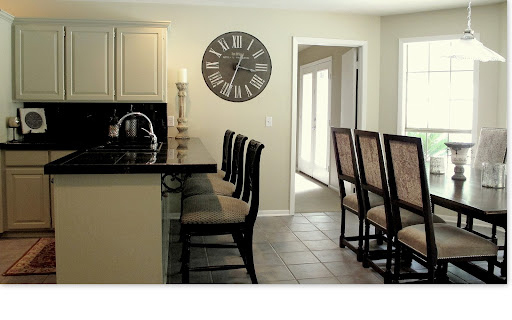

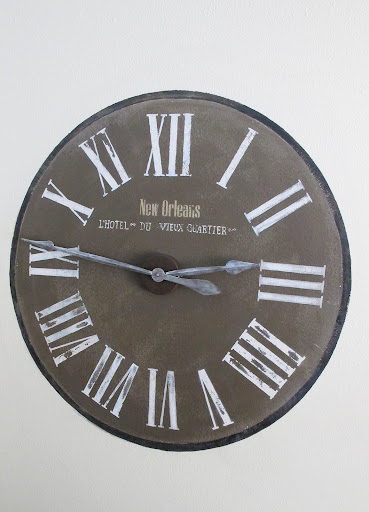
Yep, I painted a clock directly on the wall in my kitchen! It works too!
I will be honest, this project was a little time consuming. Although, it was a lot easier than I thought it would be and well worth the effort. I used contact paper for number stencils and the big round circle, basic satin wall paint and an inexpensive wall clock kit for the clock itself! I have been working on this project for the last few weeks and did a few numbers every couple of days.
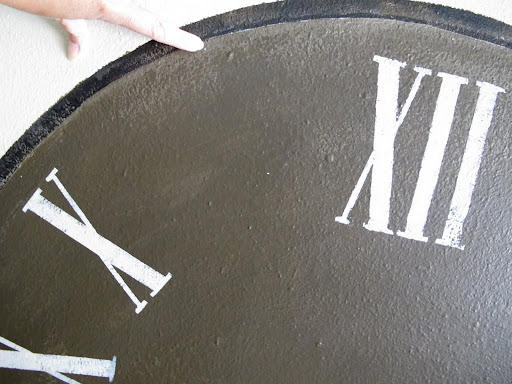
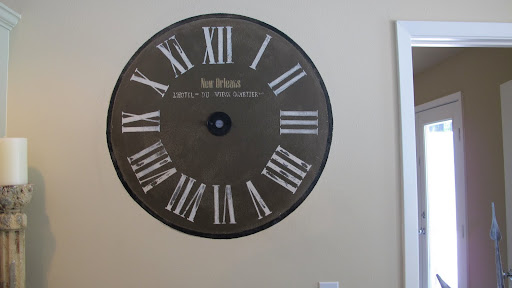
I knew instantly that I finally had a solution for my boring kitchen wall. I immediately started going through pictures of old antique large clocks on Google Images and I found this one:
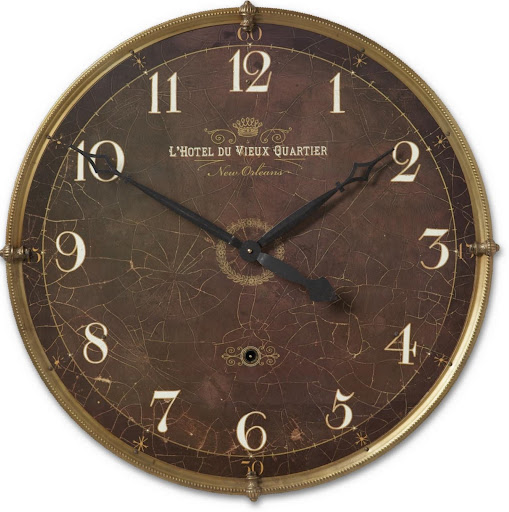
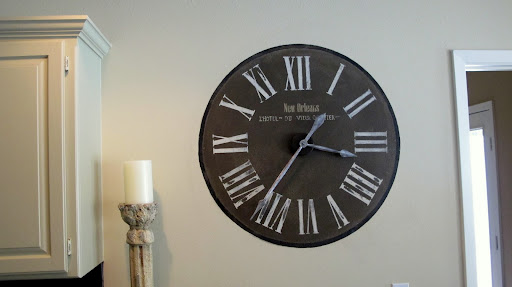
I loved this New Orleans clock and the color combination worked perfectly for my kitchen, so I started a plan and drew what I wanted on paper. Using the New Orleans clock for inspiration I decided to changed up a few things including the change to roman numerals, the border and I decided not to crackle my wall (I thought about it though!) I know they sell vinyl wall clocks, but I wanted the worn and old look that you just can’t get with vinyl. I could have done this on a piece of wood as well and hung it, but I really loved the idea of it being directly on the wall.
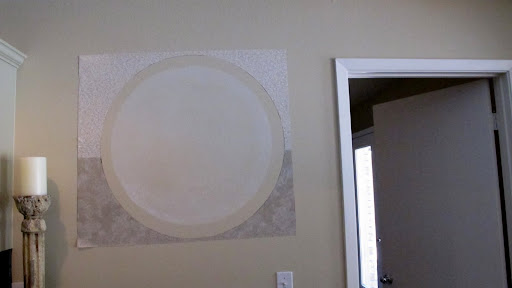
The next thing I did was to determine how big I wanted the clock to be on my wall and how it would be positioned. Important to note that I got really lucky that my clock size and numbers just happened to be the exact right size for the clock kit to tell the right time. If you do this project, get the kit first and read the instructions to be sure. I had originally just planned on using the clock hands and just setting it to 5:00 PM (it’s 5:00 somewhere).
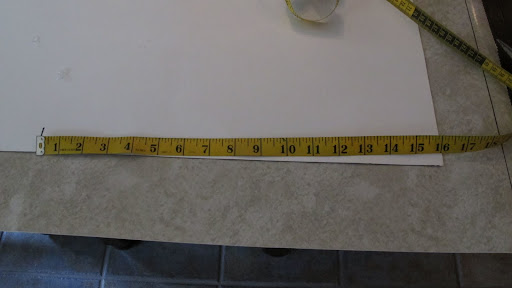
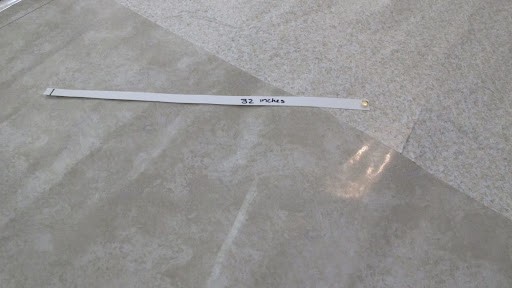
In determining my clock size, I used tape to make a square of how tall I wanted it and how wide and then I measured. I determined that my clock was going be 32 inches across, and 32 inches tall. In pencil, I marked the top, sides and bottoms with a line so it could guide me later.
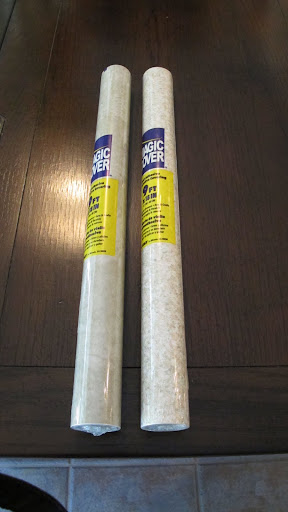
Next, I got out my basic dollar store contact paper. I bought two rolls for this project:
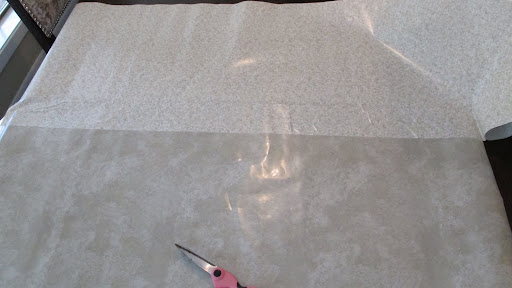
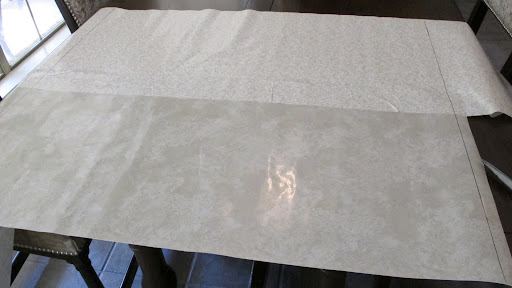
I then unrolled the contact paper about 40 inches and then unrolled the second roll 40 inches and attached about them about 3 inches to make it a larger sheet. I did this because I needed my stencil to be wide than the width of a standard roll contact paper. Like this:
I then needed to draw a circle on the contact paper so I cut a long rectangular piece of poster board 17 inches (Half of what my width and height were going to be plus 1 inch). (please ignore the 32 written on my poster board stick, it was a screw up and should have said 16!!):
I then measured and drew a line on my poster board guide for 16 inches and 15 inches. I then put a magazine in the center under my large contact paper and put at tack through the end of my poster board guide, contact paper, and into the magazine right in the center. I held a pen in the 16 inch cut that I cut halfway and gently drew my circle while I lightly pushed the poster board guide around:
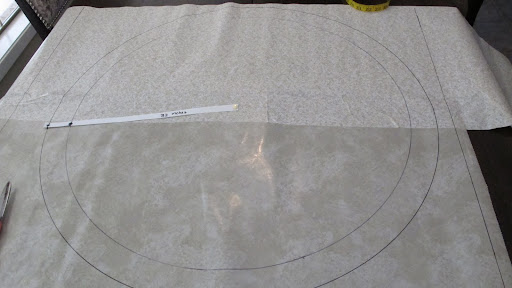
I then drew my line at the 15 inch mark. (If you’re not making a border, you can just make your circle).
I then carefully and precisely cut each line. I kept the outer paper as well as that served as my stencil for the outer border.
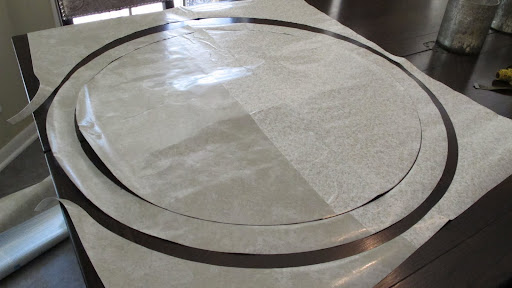
I needed to paint my inner circle first, so I put up the stencil that is the border ring. I made sure it was attached really good by going over it with the edge of a credit card. Yikes, another screw up here! The white circle SHOULD be brown (long story!) I then painted the inner circle brown.
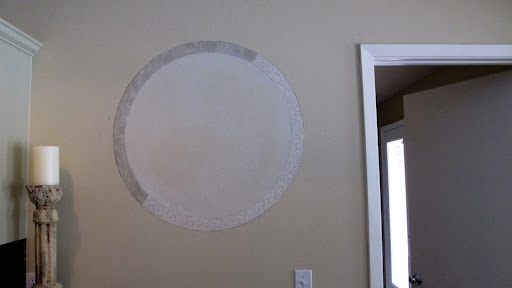
I then put the outer contact piece onto the wall (stencil for the border). I also cut the round inner circle contact paper about a 2 inches in (didn’t need the whole circle) and attached on the wall as well and lined everything up. Again, I smoothed with edge of credit card before I painted my border with a black satin latex paint.

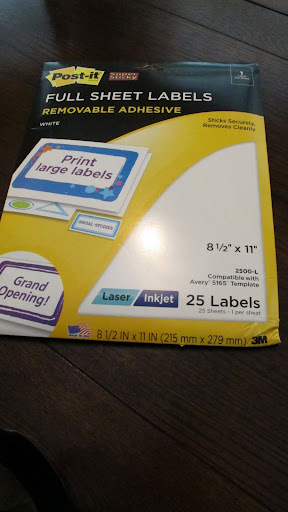
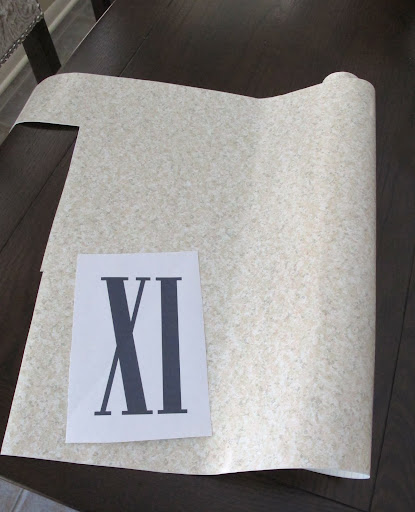
The next thing I did is that I created all my roman numeral numbers on the computer in the font Niagara Solid at size 550. I printed all of my numbers on 8.5 x 11 removable adhesive labels.
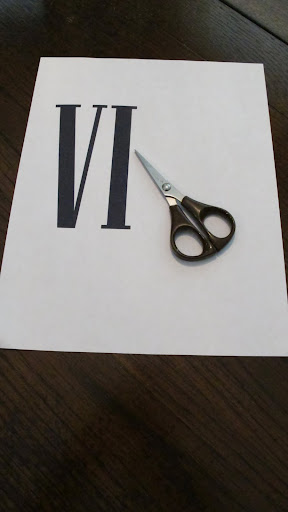
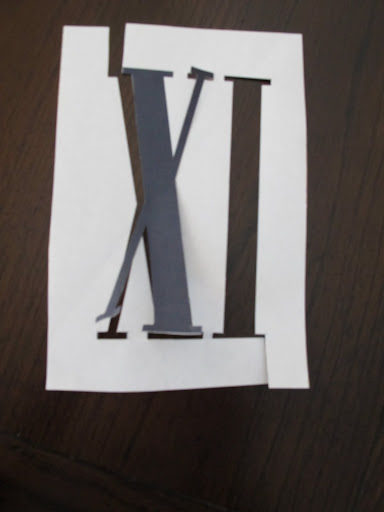
If had a Cricket or Silhouette, my time would have been cut in half. I had to cut each one with small sewing scissors. But first, I cut a square around each number and the pull the backing off and attached on top of contact paper. I wanted my stencil to work real well since I have a light orange peel finish on my wall. Then I cut out the number… Each number…
After I cut out my number, I placed it an inch below a predetermined little spot that I made on my clock based on figuring the circumference of the circle divided by 12. I used a cloth tape measure to figure out each spot around the clock (Mine was around 8 inches apart). You can see my dot below:
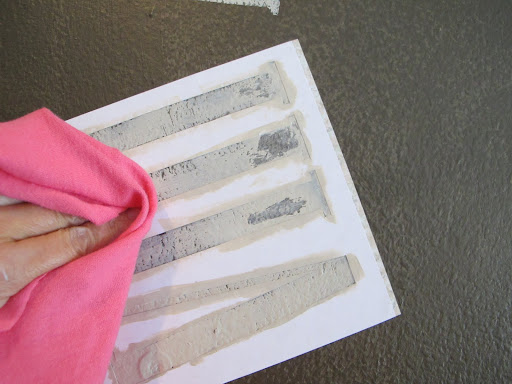
I then placed my number stencil in the right spot (some are angled or suppose to be upside down) and I used the edge of a credit card to really get it flush. I then lightly with very little pressure around stencil edges brushed on latex paint. Sometimes I just brushed with very little paint to make it look worn.

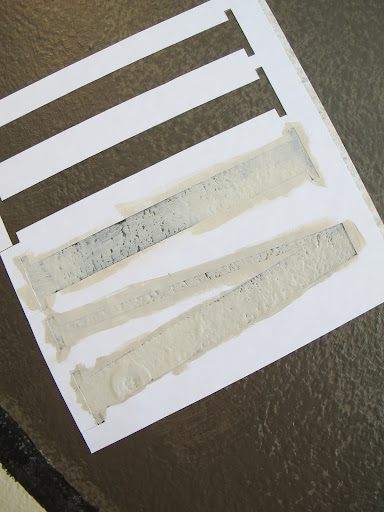
After 5 minutes, I took an old t-shirt and pressed it on the painted number (stencil still on). I then wet the t-shirt very lightly and carefully brush off paint until I got the desired look I wanted. I then removed the stencil and wiped over and over with a lightly damp t-shirt to even up edges and distress a little more. Yes, some paint will come up and get all over but I kept wiping it until it was gone. If you have any paint seap from the stencil, wiping your numbers after 5 or 10 minutes with a damp cloth will even it out.

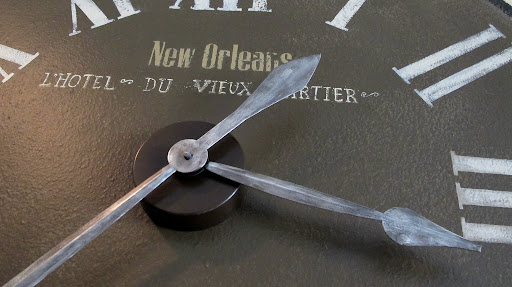
I painted my “New Orleans” and other lettering in the center of the clock by free hand.
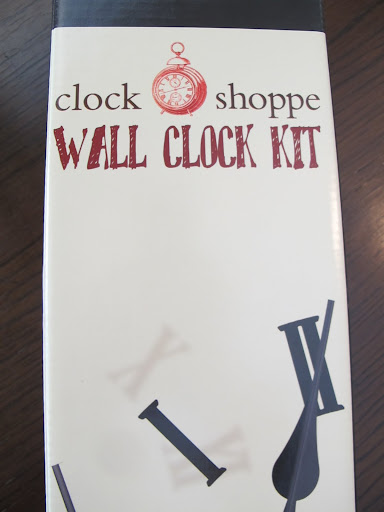
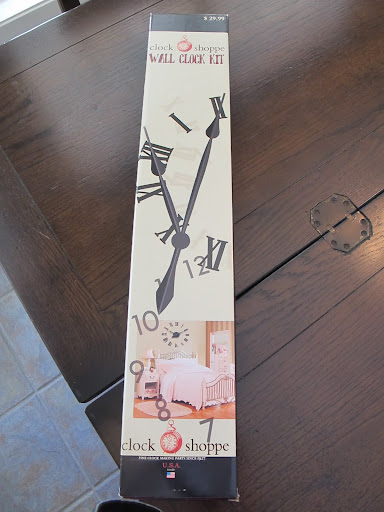
The last step for me was to install the wall clock kit. I purchased my Clocke Shoppe wall clock kit at Hobby Lobby for $29.99.
The instructions made it so easy. This is what it looks like and the small round box is just mounted with screws on the wall in the center of the clock and you add a AA battery.
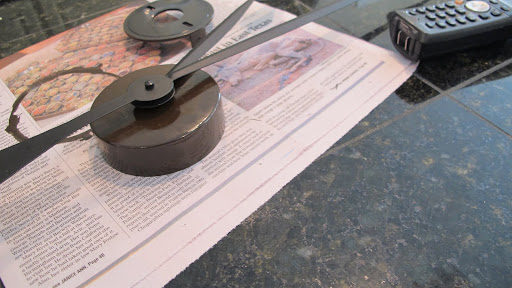
The clock kit comes with vinyl lettering that I did not use. My only problem was that the clock hands were too long. So I just snipped the tips with metal clippers to where I needed them. I painted the clock kit battery case the same dark brown so it wouldn’t stand out. I also painted the clock hands with silver Testors Enamel Paint that works great on plastic and metal. My husband installed the clock kit for me.
Well, I think this is by far the longest tutorial I have ever written! I have to say that it was well worth the tediousness and time! But, it only cost me about $30.00, so I am very happy! I am so thrilled that everything worked out so well, otherwise I would be making a call to get my wall floated(made that call before).
If any of you are thinking about doing this project and have any questions at all, please let me know! Again, if you are going to do this project, please read the clock kit instructions first to be sure that you create the right size for the clock hands to tell the right time!
As always, thank you so much for your comments, notes and emails! I just love hearing from you and can’t thank you enough!
Have a wonderful week and I have another project ready to be posted later this week.
Cheers!
Cyndy
Susan @ homeroad.net says
This is fabulous! I love it in every way Cyndy! Your kitchen looks beautiful and that clock is such an inspiration!
Susan
Deborah March says
OmiGOSH, this is SPECTACULAR!!! WOOT to YOU!!!
Claire says
This is amazing-what a beautiful job and such a unique focal point in your beautiful kitchen-;ove it!!
imsteelefullofscrap says
Wow you have an amaxing kitchen and love the clock you did!
Anonymous says
LOVE LOVE LOVE your clock! You have inspired me I am going to give it a try. Thanks for the tip about the proper size kit for the clock. Wish me luck. Linda
lauren @ West Furniture Revival says
so cool. i love it!
Anonymous says
Love your clock! How did you install the clock kit? Jane
The Exchange says
Thank you so much ladies! Jane, I just added an additional picture of the clock kit in the post to better describe. It's a small round plastic box with hands that go on the wall in the center. You mount it with two screws and it takes one AA battery.
Cheers!
Cyndy
Carmella says
Beautiful!…it looks wonderful in your kitchen! Also, thank you for such a great tutorial!
L.Lane Designs says
I Love it!!! Must do this in my kitchen! New follower too! Found you through Tip Junkie.
Admin says
Inside Decoration close to the Wall Clock
Plain partitions with negligible quantity of wall equipment create a good impression of your wall clock. As well as, be sure wall posters aren't positioned too close to the wall clock.
Meggan of Lila Grace says
Amazing! I am so impressed and love that idea! I am your newest follower 🙂
Janette - The2Seasons says
That's one of the best do-it-yourself projects I have ever seen. You deserve the gold star!
Shelia says
You are absolutely the smartest one! How clever and it looks like a real clock hanging up there! It's marvelous!
be a sweetie,
Shelia 😉
once in a blue moon says
VERY crafty!
Kim @ Savvy Southern Style says
That is truly a WOW! It looks fantastic. Thanks for sharing it at WUW!
Miss Char says
Fantastic project and a perfect location too. Thanks for sharing your project and for providing such a great tutorial.
bj says
WOW…this is some project. HUGE
You did such a fantastic job…you deserve a dinner out, wine and CHOCOLATE.!! 🙂
Evie @ Brown Paper Packages says
Wow, that's gorgeous! Great job!
poindextr says
you did a GREAT job! I love that you made it yourself and it's totally unexpected. Bravo bravo!!
CraftyCanadian says
OMG..I love it.
I'm going to do this at the cottage! I have a HUGE wall with nothing on it, and would love a clock, but the clocks big enough for that spot are all over $100! This is the perfect solution, thank you so much for posting!
Korrie@RedHenHome says
Very cool! What a fun, unique idea. It looks great!
Colleen @ MuralMaker&More says
Just fabulous. And a great tutorial too! Thanks so much. Dropping by from Someday Crafts.
Mikey @ Shabby French Cottage says
This is so beautiful! I have a similar, but purchased clock in my kitchen! Thanks for sharing how easy this is to achieve! I may have to do this! Now Following!
~Mikey @ Shabby French Cottage
http://www.shabbyfrenchcottage.com
Lauren @ My Wonderfully Made says
I am SO amazed by this project! Thanks for the detailed tutorial — I really think I might try this! When I redecorated our living/dining room, I took the clock down that had hung in the same spot for years and we STILL look to that wall to see the time! My family keeps telling me "we need a clock"! Thanks for this great idea!
Anonymous says
I just love this project. My husband thinks we should try something similar in our bedroom!
Nell
Erin says
What a great idea. I have always made my big clocks with wood and vinyl. I would love to do this in my home. You can also use vinyl as a stencil, that way you don't have to measure.
Linda says
What a great project! Thanks for sharing it with us! Hopped over from Savvy Southern Style…I am a new follower!
Maureen says
This looks incredible! I LOVE IT! You did such an amazing job with this. I happily found your beautiful blog on Somewhat Simple and am your newest follower!!
http://www.releasemecreate.blogspot.com
Rhonda says
Wow, very impressive and it certainly makes a statement! Love it!
Megan says
I love this idea. I'm thinking right now about where I can do this in my house.
megan
craftycpa.blogspot.com
Barbara Jean says
it's great!!! looks awesome and love the idea.
blessings
barbara jean
Shannon at madiganmade says
It was worth the effort – It looks fabulous! Love the location, too, and how the dark color picks up the colors in your kitchen, too.
Heaven's Walk says
WOW! What an amazing project, Cyndy!!!! I just LUV it! So unique and oh so clever! You did an incredible job on it!!! 🙂
xoxo laurie
Funky Junk Interiors says
How fabulous is this! I love your choice of colors too. Genius, girl!
Shared this on SNS 91 on FJI Facebook. 🙂
https://www.facebook.com/photo.php?fbid=10150314651261141&set;=a.192514281140.164586.175378011140&type;=1&theater;
Donna
Kristen@fit2feelbetter says
This clock is awesome! You have some crazy patience. (-: Just saw you featured on Stories of A to Z.
Joselyn@ The DIY Spot says
Wow! Love this. Great job!
marie says
I am not even a follower, but I can see that you are amazing! Bravo!
Terry says
I just saw Sarah Richardson on Sarah 101, HGTV do something like this on a wall only with vinyl. Such a neat idea. Yours looks great and I have always loved Sharon's style in home decor.
Christine says
I love this, thank you for your excellent tutorial. I stumbled this post and I am pinning your wall clock!
Judy says
Pretty amazing. It looks great. I will be featuring this project at my Sizzle into Summer party that opens tomorrow night at 8pm EST. Please stop by and pick up an I've Been Featured button. Thanks.
Lauren says
Wow! Thanks for sharing the tutorial for this. It looks perfect in your kitchen!
Biz says
This is such a great idea, I just wish I lived in a home where I could paint the walls! Living in military housing limits what I can do. Maybe someday!
Biz
Sherry says
Thanks Cyndy…. you inspired me…turned my lazy susan into a vintage looking clock for my table totally luv it…posted it on my blog @ buzibeestudio.blogspot.com Thanks a bunch for sharing
Sherry
Ellie says
Very cool! Saw your feature at Under the Table & Dreaming. Great job!
Rita VonCoupon says
Love it! Such a bold and creative move, it looks awesome!
Thanks for joining us on the Weekend Alexa Blog Hop! Hope to see you next weekend!
http://www.bargaindesire.com
Melody J Haislip says
I have such deep respect for people who do these things. I saw one on an HGTV show recently. So clever! Snaps to you for a project beautifully completed! It adds a nice note to the room.
Anonymous says
This looks lovely, btw, what is the color on your wall?
-Nik Nak
Deborahg says
Stunning! I’ve been planning to paint a huge clock. I love how yours turned out.
Jennifer says
Good afternoon, love the wall clock idea. What if I didn’t want it to be painted on the wall?? Would the contact ppr stay?? Any ideas??? Don’t wanna go overboard on price though!! Thanks. Jennifer
kellie says
I bought the same clock kit and have a question about it, how does it come apart on the back? Mine came with no instructions clearance at hobby lobby. Do I unscrew it? Thank you for help. I am going to put it in my kitchen too! I love the Osbourne house!
Inspire Me Heather says
Your clock is fabulous, nice job! I’ve got this linked to my clocks post too today, for inspiration!
Cyndy says
Oh wow, thank you so much Heather! Thank you for sharing!
Martie Nicole says
Your clock is so awesome it has inspired me to make one as well!:) I tried painting my clock hands but got really bad results. I’m wondering if maybe I used a bad brush. What kind of brush did you use??
Onika says
Great Tutorial, Thank you so much for sharing. Now I want one of these in every room lol
Kit says
What a great tutorial!
Thank you for taking the time to share your insight and experience in tackling this project. I think that your clock is even more interesting (and original) than Ozzie’s. That said, his decorator placed his clock in a spectacular spot in that living room.
You showed the rest of us that the ‘wall clock’ idea’ can work in a completely different setting and can be just as spectacular. This affordable DIY clock treatment may be a future classic…who knows?
rocksister says
I want to do this and had no idea how it worked or how I would be able to change the time for daylight savings time. Still don’t know that part but I will see it on the box. Thanks for the information, it looks gorgeous!!!
Jobie Medina says
This is exactly what I was looking to make. Beautiful! Thank you for your detailed description. Great job! ?