

This is one of those projects that the end result was not what I had set out to do. I love projects like this, when veering off the path and trying something crazy, actually produces something pretty cool.
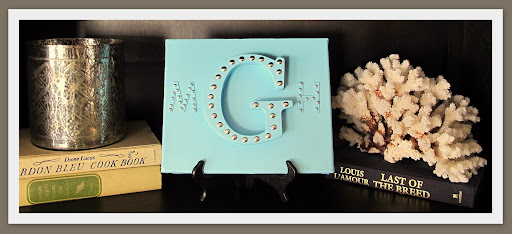
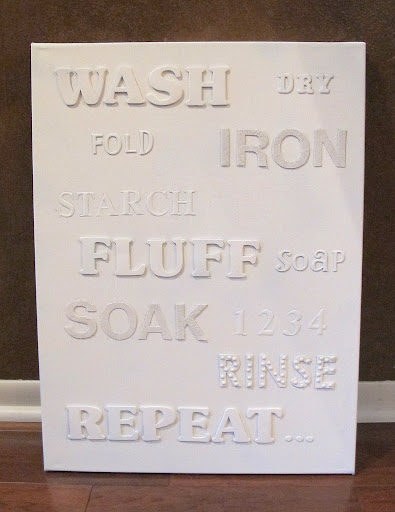
I can’t believe I’m saying this but Yes, what you are seeing in the pictures above are spray painted sticker letters. It cracks me up! Who would have ever thought that our kid’s overflowing sticker bins are full of home decorating treasures? Not me! The letter stickers are mostly foam, felt and plastic sticker letters hijacked from my 6-year old daughter’s sticker stash.
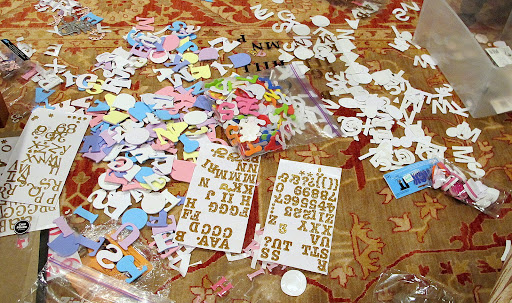
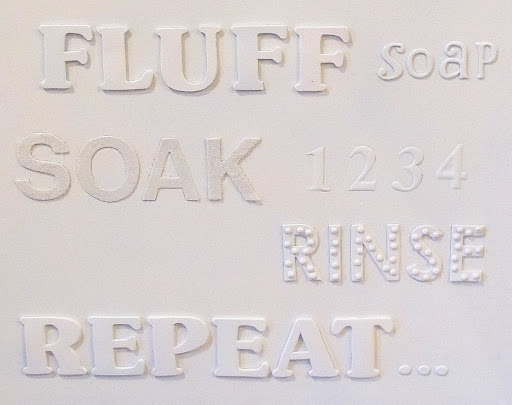
I stumbled across spray painting various sticker letters to a canvas in my failed attempt (short cut) to make subway art. Needless to say, my subway art didn’t work out (cringe) but during the process, I fell in love with the look that the monochromatic painted canvas and stickers produced. The dimension, the textures, it’s so easy and so cheap! Maybe it’s just me (unfortunately, it wouldn’t be the first time) but I love the end result and of course I couldn’t make just one!
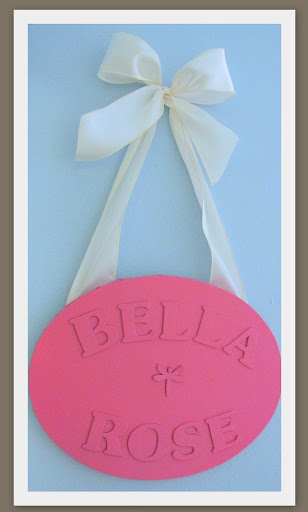

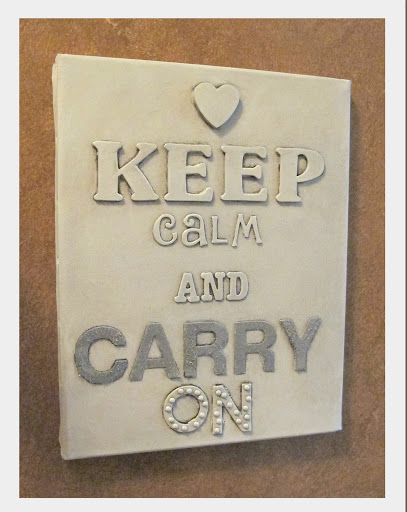
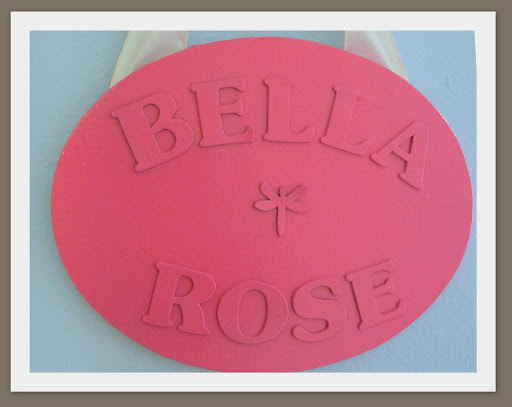
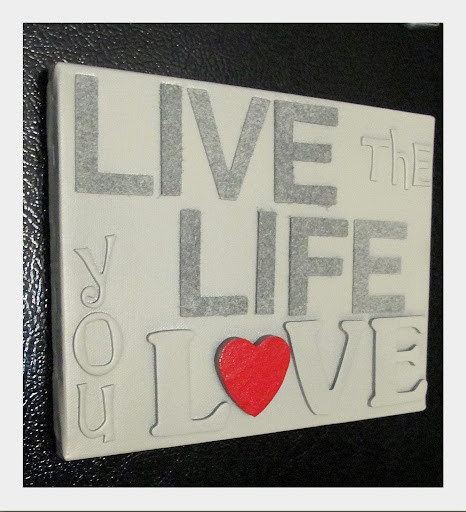
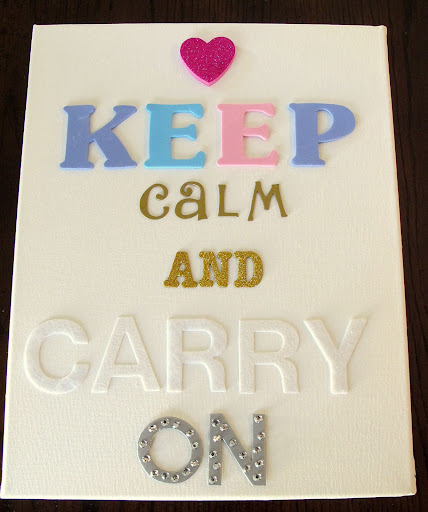
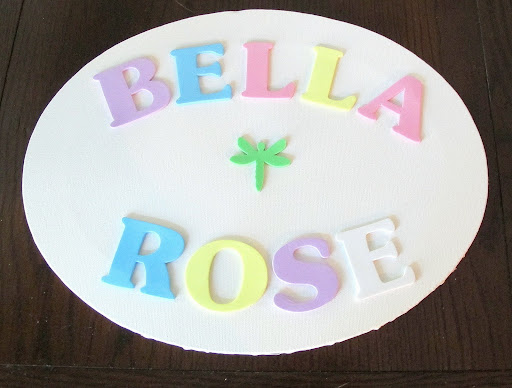
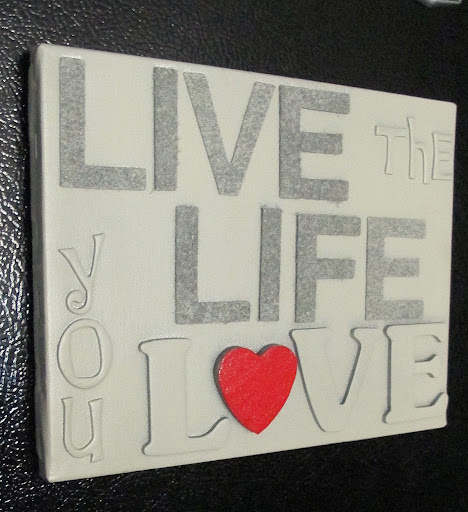
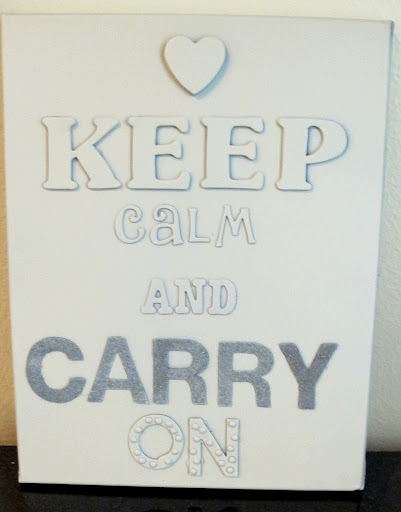
This project is as easy as it looks and the possibilities are endless. I used almost every type of letter sticker and die cut letters imaginable and each one worked beautifully and is now permanently attached to the canvas. I do have to say, the felt letters added a cool texture and the foam letters add dimension as you can see in this canvas that I made for a Valentine’s Day gift for a friend to put on her refrigerator:
There are a few things that I did to make sure that the stickers basically became permanent on the canvas. The most important thing in spray painting these letters to canvass or wood is to use primer after you have placed and attached the stickers to the canvas.
I used two coats of primer that I allowed to completely dry in between each coat. The primer not only seals the edges of the stickers to the canvas, but it seals the top of the foam stickers (so the spray paint doesn’t just absorb into the foam leaving foam holes, which it will without primer). Secondly, primer helps the stickers accept the spray paint better.
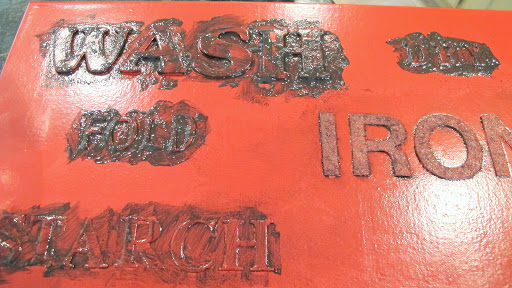
After the two coats of primer dried, I evenly sprayed my canvas two times with spray paint, allowing the first coat to completely dry (heavy, but not too heavy that it pools or runs). For my light colored canvasses, I spray painted the canvas black first so that the letters would have some black around the edges and on the felt letters that would add shading under the lighter top layer of paint:
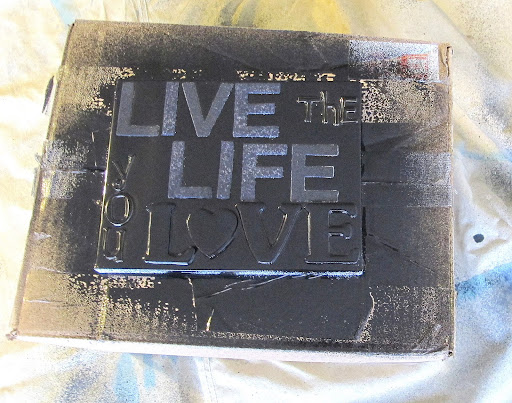

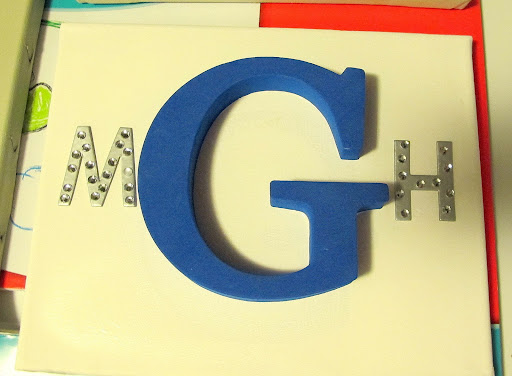
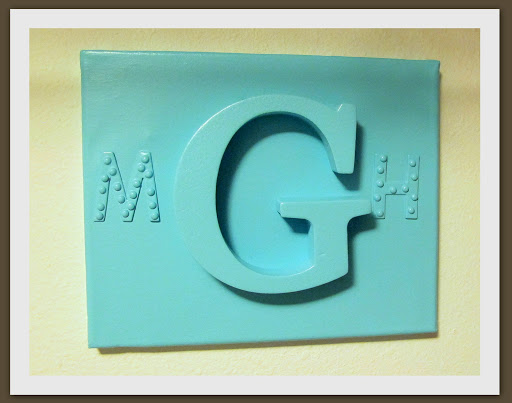
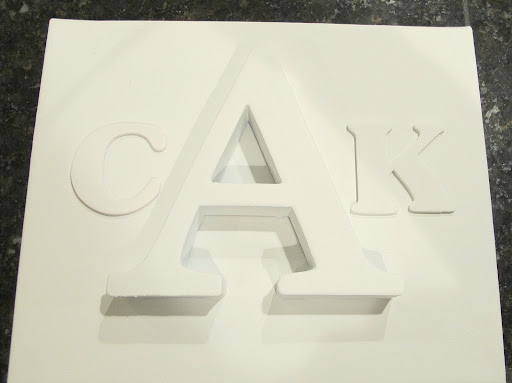
For the large foam letters made by EVA that I used for the monogram canvasses, I first hot glued the letters to the canvas since it does not have adhesive. I then sprayed two coats of Gesso Spray (which is primer especially made for unprimed canvasses) because it is very thick and clay like and fills in gaps between the letter and canvas.
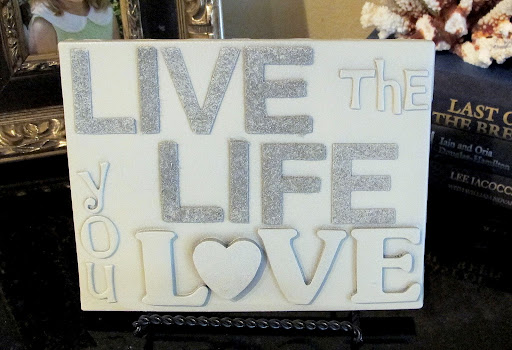
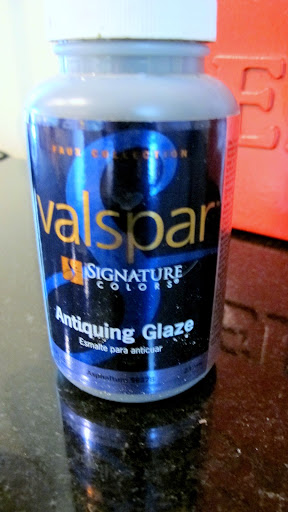
After I was done doing all of my spray painting and the canvasses had completely dried, I glazed and embellished several of them to accentuate the letter edges. For glazing, I used Valspar Antiquing Glaze:
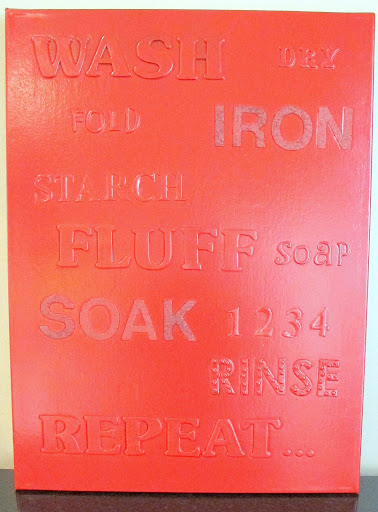
I loved the look of these two canvasses before the glaze but I went ahead and glazed just to see how it would look:

I also couldn’t resist and just pushed silver office brads into the letters to bling out my monogram canvas (I had to poke a small hole with a knife tip for the flatter letters):
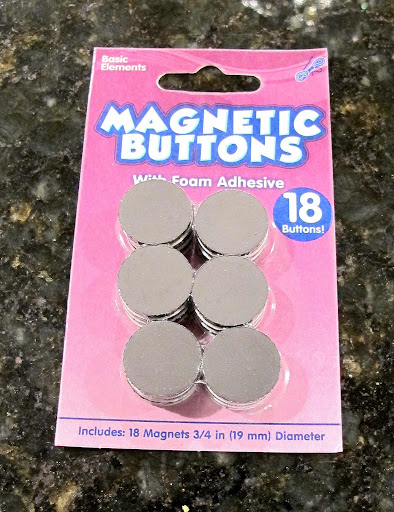
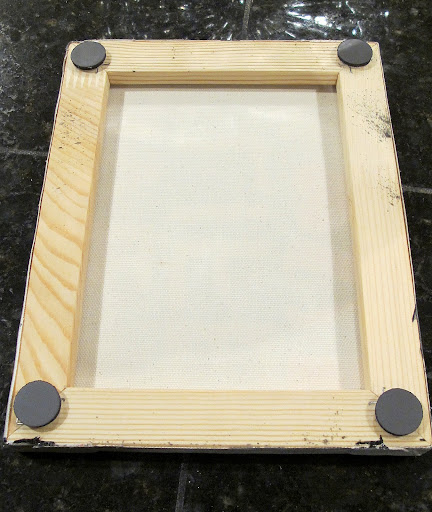
For several of the smaller canvasas, I am making them for Valentine’s Day gifts and have attached round magnetic buttons on the back for the refrigerator:
Wow, I still can’t believe that something so cheap can produce these fun results! I you guys decide to try this project, please send me pictures!
Thank you again for your sweet comments, emails and notes, I appreciate your feedback so much! I promise, I will be posting pictures of my laundry/craft room revamp shortly. I got a little sidetracked here with this project.
Have a fantastic week!
Cheers!
Sharing post with:
Prudently Painted Vintage says
LOVE this! I will be making one for my laundry room for sure! Thanks for the inspiration!!
Erin says
This is such a cute idea. I need to start thinking outside the box with the letters I have around my house more often. Way creative and great idea!
Sassy's Ramblin's says
This is fantastic!!! Thank you so much!!!
≼mE aNd mY tℎrIfTy IdEaS≽ says
WOW! I am so impressed! They seriously look awesome! Great turnout!!! Now off to find the stickers…
WobiSobi says
WOW this is great!! I can't wait to do some of these. BEAUTIFUL! Fantastic Job.
Lindsay @ Diary of a Crafty Lady says
This is so cool! I love the textures!! Thanks for all the great info.
Lindsay
A Vintage Vine says
So cute! Great idea…and so easy!
Lb Scrapgirl says
WOW! I wanna try it, too.
Julie says
Love those! They are so cute and creative!
Stacie says
I LOVE this idea! Sooo Creative! I am for sure giving this a try 🙂 Thanks for sharing! BTW…I featured it here:
http://thecreativecrate.blogspot.com/2011/01/diy-3d-ish-wall-art-love-it.html
Thanks again! 🙂
Janet says
This is so creative! I see foam stickers on clearance in ugly colors all of the time and never would have thought to spray paint them! The glaze makes such a big difference too, great job. 🙂
Kris says
These are so SWEET! I am putting these on my list of things to do.
Anonymous says
Best craft I have seen in a long while!!! Love it!
Kerri says
How fun and easy! I love it! And, best of all…those foam letters are always so cheap! Thanks!
lauren @ West Furniture Revival says
LOVE THE SIGNS.. GREAT IDEA.
Colleen @ MuralMaker&More says
This is just completely phenomenal! I love super simple projects that look like super expensive projects! I'm gonna go raid my grandson's stash right now!
Please join us this weekend at Passion for Paint and link up your project! Links open Friday night @ 6 pm PST.
http://MuralMaker1.blogspot.com
The Exchange says
Thank you everyone for your sweet comments!
Debbie@http://refreshrestyle.com/ says
I love this, and hope to make one very soon! Thanks for thinking outside the cricut box (I can't afford one and wanted to do some subway art)!
Debbie
Donna Brady says
Wow! These are wonderful. I will be trying these out! Thanks for the inspiration.
Monica de Moss says
Great idea!
I am definitely putting this craft idea on my list of things to try!
Anonymous says
Great Idea! Love these! I need to know what kind of primer you used, spray or brush on? Thanks, Paula Owens
The Exchange says
Thanks Paula! I used spray primer! Black, grey, white, green, whatever I had it doesn't matter. Save yourself time and energy and just spray it and it will dry a lot faster and only takes a small amount! Have fun!!
Erica | Sticker Printing says
This is actually a cute idea and I think your really creative to come up with this one. Thanks for sharing this one!
Jana says
Turned out great! I had to check it out because of the CAK…those are my husbands initials!
Biz says
Saw you at the Shabby Nest!
Thanks for sharing the ingenious idea!
Biz
Dear Sweet Home says
What a great idea! Your home is beautiful – love your wall art ideas – especially the old window message boards. Thanks for the sweet words you left on my blog…I look forward to following along on your blog :0)
Gracefully Vintage says
Cyndy, Love those, they are so cool, my daughter is pushing me to go buy some letters so she can make her owne creation-
Thanks for stopping by my blog- YOu can get a sweet little chandelier at Lowes- Not to pricy either..
I just Adore them
Karryann
Sommer says
These are AMAZING! Thanks for showing us how to do it, I am going to be making a ton! lol. I would be delighted if you would link this up to my VIP party =) http://designergarden.blogspot.com/2011/01/vip-party-2.html
Inspire Me Heather says
Your signs turned out fabulous! Well done, I'm sooo liking them!!
Anji Johnston says
What an absolutely brilliant idea! The possibilities are endless! It's off to Micheals for me after work today – I have a few choice quotes that need displaying! Thanks!
Meg says
Fun! I love how 3 dimensional they are. And the colors are fun, too–with spray paint you can go any direction. Brilliant!
I hope you can join my link party! Each entry leaves you eligible to win $130 from CSN Stores.com. alittleknickknack.blogspot.com
Kristin @ Daydream Designs says
This is awesome! I am totally going to have to try this. Thanks so much!
Chiara says
Darling! The final products are stunning! Thank you for sharing this creative idea with all of us. : )
Lucy Designs says
get out!! these are awesome, love them!
Funky Junk Interiors says
Incredibly brilliant! Truly. I had no idea how you accomplished this and it just couldn't be easier.
I've featured you on SNS #67's sidebar this weekend. 🙂
Donna
http://funkyjunkinteriors.blogspot.com/
Rachael@Lovely Crafty Home says
I love these!! Especially the monogram with brads. Will you share at my linky party today?
FinsFan says
You and Ms Funky Junk Donna are kindred spirits–with making signs and all the talent! I'm going to try making one (my own copy you challenge-HA) for valentines gifts! so glad Donna shared your blog! have a great rest/of/weekend.
Kim @ Cheap Chic Home says
Wow – these turned out so cool! I like that you just had the stickers laying around and they provide so much impact. Nice job!
Elizabeth (Blue Clear Sky) says
Hi, I’m stopping by from Funky Junk Interiors. Cool ideas! The monograms with brads are my favourite.
Claire says
I loved your embellished monogrammed name frames for the holidays and now these-Wow-you blew me away-how creative can one gal be-love these and I'm def gonna copy!!!!!!!!!!!Thanks for the inspirations-I'm your newest follower-come by for a visit-Claire
Claire says
Also, wanted to let you know I'm featuring you on my blog today-your ideas really inspire me!
Allyson Pecilunas says
I love this great job!! I just found your blog and am now following along. Come check me out if you get a chance.
noplacelikehomally.blogspot.com
~Allyson~
Katie @ OhhBaby says
This is so neat! I love what you have done! I'm following you from one of these linky parties (I forget which one! oops!) If you get a chance, please check out my blog too! Its nice to meet you!
Judy says
What an incredibly great idea. I have to try this. I have bins of stickers for my kids as well. Who knew how great you could make it look. I love it. Thanks so much for linking up to my party.
Anonymous says
love these canvases, so cool I'm going to try some of these
Mary P says
how fantastic! so brilliant
HI THERE! says
Amazing!! I'm so happy to find a use for these letter stickers that I have all over my house!
cucumbers and vinegar says
What an amazing/creative/awesome idea! Can't wait to make one of my own!!
Anonymous says
Such a great idea, really pleased I stumbled across your site.
I'm not very clued up when it comes to arts and crafts. Do you know where I can get the antique glaze from (I need it delivered to the UK). I've been looking for a UK alternative and don't know what I'm looking for!!!
Mary Ruth Kozma says
Just read your post with the gold letters! This post also has motivated me! You are so good to your readers, sharing WONDERFUL inexpensive projects with clear instructions. Thank you for your generous spirit!